Dig Deep, Store Smart: How to Build a Root Cellar That Works All Year Long
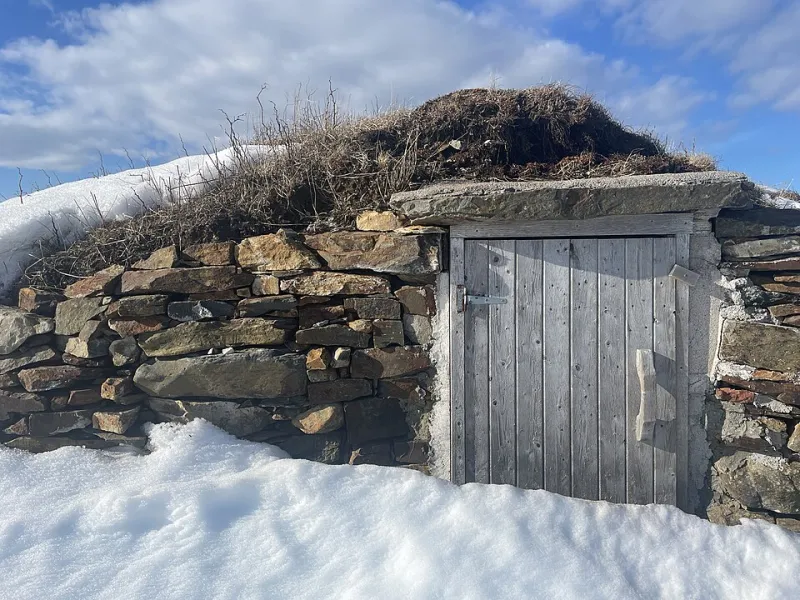
Photo: HeritageNL, CC BY-SA 4.0, via Wikimedia Commons
There's something deeply satisfying about pulling a firm, sweet potato out of cool darkness in the middle of February — one you grew yourself, stored yourself, and didn't have to pay a utility company a dime to keep. Root cellars are one of the oldest tricks in the homesteader's playbook, and honestly, they've never gone out of style. If anything, more folks are rediscovering them as grocery prices climb and the appeal of true food independence grows stronger.
Building a root cellar isn't complicated, but it does require some thoughtful planning. Get the basics right, and you'll have a storage system that outlasts any appliance you could buy.
Choosing the Right Spot on Your Property
Location makes or breaks a root cellar. The goal is to tap into the earth's natural insulating power, so you want a spot where the soil stays consistently cool — ideally between 32°F and 40°F — and where moisture levels can be managed without a constant battle.
A north-facing hillside is the gold standard. The slope gives you natural drainage away from the structure, the northern exposure limits direct sunlight warming the soil above, and you get easy access to dig a horizontal entrance rather than a straight-down shaft. If you don't have a hillside, a flat site works fine — you'll just need to pay closer attention to drainage and ventilation.
Stay away from large trees. Roots are relentless, and over time they'll find every crack in your walls. You also want to keep the cellar at least 10 to 15 feet from your home's foundation to avoid any moisture migration issues.
Your Two Main Construction Options
Basement Conversion
If you already have a full basement, converting a corner of it into a root cellar is the most budget-friendly path. Pick a corner with two exterior walls — that's your cold source. Frame out a small room (8x8 feet is plenty for most families), insulate the interior walls and ceiling heavily to separate it from the heated house, and leave the exterior walls and floor uninsulated so ground cold can do its job.
Ventilation is critical here. You'll need at least two vents: one low on an exterior wall to pull cool air in, and one higher up on the opposite side to let warm air escape. Simple PVC pipe works well. Cap the outside ends with mesh to keep critters out.
Dedicated Underground Structure
For those without a suitable basement — or who want more capacity — a freestanding buried cellar is the way to go. The most popular modern approach uses concrete culvert pipe (typically 8 to 10 feet in diameter), buried horizontally into a hillside or below the frost line on flat ground. These are durable, relatively affordable, and can be sourced through local concrete suppliers.
Alternatively, poured concrete or concrete block construction gives you more flexibility in shape and size. A simple design is a rectangular room, roughly 8x12 feet, with 8-inch-thick walls, a concrete floor with a slight drain slope, and a heavy insulated door. Backfill with at least 2 feet of earth over the roof for adequate insulation.
Whatever method you choose, waterproofing the exterior walls is non-negotiable. Apply a quality waterproofing membrane or use hydraulic cement on any cracks before backfilling.
Managing Temperature and Humidity
The sweet spot for most root vegetables is 32°F to 40°F with humidity between 85 and 95 percent. That sounds precise, but your cellar will largely manage itself if it's built correctly — your main job is fine-tuning.
For temperature control, adjustable vents are your best tool. Open them on cool nights in fall to drop the temperature quickly, then dial them back as outdoor temps plunge in deep winter to keep things from freezing. A simple min-max thermometer inside the cellar lets you track what's happening without having to open the door constantly.
Humidity is trickier. Most underground cellars run naturally humid, which is great. If yours runs dry, placing open buckets of damp sand or setting produce in boxes of slightly moist sawdust helps. If it's too wet and you're seeing mold or rot, improve airflow and consider laying gravel on the floor to allow moisture to drain away from stored goods.
What to Store Where
Not everything wants the same conditions, and a well-organized cellar takes advantage of its natural temperature gradient.
Coldest and most humid zones (near the floor, away from the door): carrots, beets, turnips, parsnips, celeriac. Pack these in damp sand or sawdust in wooden crates to maintain moisture and keep them from drying out.
Slightly warmer and drier (mid-shelf level): potatoes. Keep them in the dark — light triggers greening and solanine production. Burlap sacks or wooden bins work well. Keep them away from apples; the ethylene apples release will cause potatoes to sprout early.
Warmer and drier (upper shelves, near the door): winter squash, pumpkins, onions, garlic. These don't want the same dampness as root crops. Mesh bags or slatted shelves with good airflow keep them happy.
Apples and pears: These store well in a root cellar but should be isolated in their own section or even a separate small area, again because of that ethylene issue.
Keeping Pests Out
Mice and insects will absolutely find your cellar if you let them. Prevention is far easier than eviction.
Seal every gap around pipes, vents, and the door frame with steel wool and caulk — mice can squeeze through a hole the size of a dime. Install fine mesh (hardware cloth with 1/4-inch openings) over all vent openings. Check stored produce regularly and remove anything that's rotting before it attracts insects or spreads mold to neighboring items.
For insects, diatomaceous earth sprinkled along baseboards and in corners is a safe, effective deterrent that won't contaminate your food supply.
Troubleshooting Common Problems
Too warm in early fall: Open vents wider at night, and consider temporarily placing frozen water jugs inside to drop temps faster during that transition period.
Freezing in extreme cold snaps: Add an interior insulating curtain just inside the door, or hang old blankets over the most exposed wall. A simple oil lamp burning briefly can raise temps a few degrees in an emergency.
Persistent moisture on walls: Check that your exterior waterproofing is intact. Improve drainage around the structure's perimeter with a gravel trench or French drain.
Produce rotting quickly: You're likely starting with compromised produce. Only store perfect, unbruised items. Even a small soft spot on a potato can spread rot to an entire bin within weeks.
A root cellar isn't just a storage space — it's a statement of intent. It says you're serious about feeding your family from your own land, on your own terms, without depending on a grid that can fail or a supply chain that can buckle. Build it right, stock it well, and come January, you'll be genuinely glad you did.
Browse our full selection of root cellar supplies, storage crates, ventilation hardware, and preservation tools at Homestead Stores — everything you need to make your harvest last.