Bees, Wax, and Honey: A Budget-Friendly Beekeeping Guide for the Self-Sufficient Homesteader
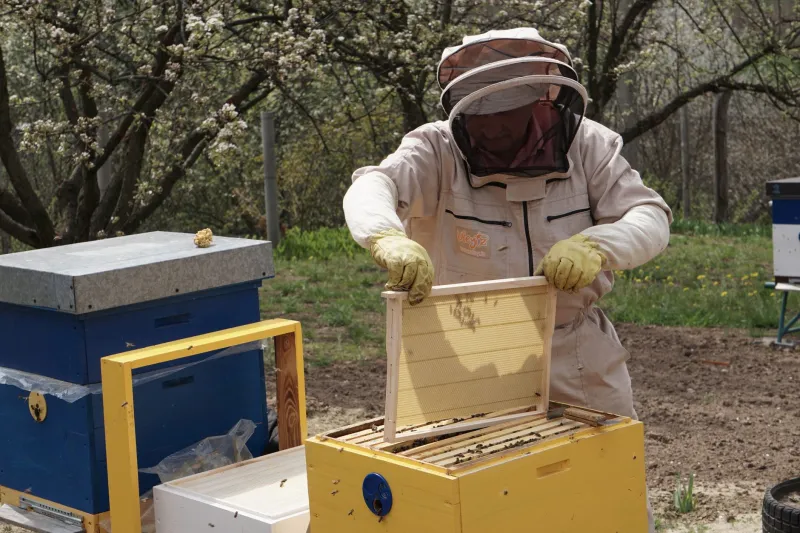
There's a moment every new beekeeper remembers — the first time you crack open a hive, hear that low collective hum, and realize you're standing in the middle of something ancient and alive. Beekeeping has been part of rural life in America for centuries, and for good reason. A healthy hive doesn't just give you honey. It gives you wax, better garden yields from improved pollination, and a deep satisfaction that's hard to put into words.
The good news? Getting started doesn't require a big investment. With some planning, a little patience, and a willingness to learn, most homesteaders can have a productive hive up and running for under $300 — sometimes less if you're handy with basic woodworking.
Choosing the Right Hive for Your Homestead
The first decision you'll make is what kind of hive to use, and it matters more than most beginners realize. The three most common options in the US are the Langstroth hive, the top-bar hive, and the Warré hive.
Langstroth hives are the industry standard. They use removable frames stacked in boxes, which makes inspection and honey extraction straightforward. Replacement parts are widely available, and there's a mountain of resources for troubleshooting. If you ever want to sell honey or scale up, Langstroth is the practical choice.
Top-bar hives are a favorite among natural beekeeping enthusiasts. There are no stacked boxes — just a long horizontal body with bars across the top that bees build comb from. They're cheaper to build yourself and easier on your back during inspections. The tradeoff is lower honey yields and fewer resources if something goes wrong.
Warré hives sit somewhere in between. They're vertical like a Langstroth but managed more hands-off, which appeals to folks who want bees on the property without weekly inspections. Great for pollination focus, but not ideal if honey production is a priority.
For most beginners, a used or budget Langstroth setup is the smart play. Check local beekeeping associations, Facebook Marketplace, and farm auction listings — you can often find solid used equipment for a fraction of retail.
Picking Your Location Wisely
Bees are surprisingly flexible about where they live, but a few placement decisions will make your life a lot easier. Orient the hive entrance to face southeast if possible. That morning sun gets the bees moving early and maximizes your foraging window.
Keep the hive away from high-traffic areas — not because bees are aggressive, but because foot traffic near the entrance stresses the colony unnecessarily. A windbreak behind the hive (a fence, shrubs, or a barn wall) cuts down on winter heat loss significantly. And if you can place the hive near your garden or orchard, you'll see pollination benefits almost immediately.
One thing beginners often overlook: water. Bees need a reliable water source within a few hundred feet of the hive. A birdbath, a shallow dish with pebbles, or a small pond works great. Without it, they'll find water on their own — usually your neighbor's pool.
Getting Your Bees
You've got a few options for sourcing your first colony. A packaged bee order (typically 3 pounds of bees plus a mated queen, shipped in a screened box) is the most common starting point. They're available from reputable suppliers across the South and Midwest every spring, usually running $130–$180 depending on the source.
Nucleus colonies, or nucs, are a step up. You get a small established colony on 4–5 frames with a laying queen, brood, workers, and some stored honey. They're more expensive — usually $175–$250 — but they hit the ground running and are far less likely to fail in the first season.
If you're patient and a little lucky, you can also catch a swarm for free. Swarms happen every spring when established colonies split and a portion of the bees leave with an old queen to find a new home. Many local beekeeping clubs maintain swarm call lists — get on one and you might score a free colony.
Seasonal Management: What to Do and When
Beekeeping follows the rhythm of the year, and once you understand that rhythm, management becomes intuitive.
Spring is your busiest season. Inspect colonies as temperatures climb above 50°F consistently. Look for a laying queen, healthy brood patterns, and signs of disease. Add supers (honey storage boxes) as the population expands. This is also swarm prevention season — give the colony room to grow or they'll leave.
Summer is largely about monitoring. Check for varroa mite levels (the single biggest threat to honeybee health in the US), ensure the colony has enough ventilation during heat waves, and watch for signs of nectar dearth — periods when flowers aren't producing. During dearths, bees can get defensive and robbing behavior between hives becomes a real problem.
Fall is critical. Your colony needs enough stored honey to survive winter — in most US climates, that means at least 60–80 pounds of honey stores. Treat for varroa mites if levels are high, reduce the hive entrance to prevent robbing and mice from moving in, and wrap hives in colder northern climates.
Winter means mostly leaving them alone. Resist the urge to open the hive during cold snaps. A healthy, well-fed colony can survive brutal winters as long as they have stores and aren't disturbed.
Extracting Honey Without Expensive Equipment
Here's where a lot of beginners spend more than they need to. A full commercial honey extractor can run $300–$600. For a hobbyist with one or two hives, that's hard to justify.
Instead, consider crush-and-strain extraction. You simply cut the comb from the frames, crush it in a bucket, and strain the honey through a fine mesh or cheesecloth. It takes longer but requires almost zero equipment investment. The downside is you destroy the comb and bees have to rebuild it, which costs the colony energy.
Another option is to rent an extractor through your local beekeeping club. Many clubs own equipment specifically for member use. You'll pay a small fee or donate a jar of honey — a much better deal than buying your own.
The Bonus Harvests: Wax and Pollination
Honey gets all the attention, but beeswax is quietly valuable. After extraction, the leftover wax can be cleaned and rendered into blocks. Beeswax sells for $8–$12 per pound at farmers markets and craft fairs. It's also endlessly useful on the homestead — wood conditioning, candle making, waterproofing leather, lubricating stuck drawers. Don't throw it away.
And don't underestimate the pollination value. A single healthy hive can dramatically increase yields in your vegetable garden, fruit trees, and berry patches. That's a real, measurable benefit that shows up on your dinner table every single season.
Common Beginner Mistakes Worth Skipping
Learn from the folks who've been there. Opening the hive too often is a big one — every inspection stresses the colony and sets them back. Once a week is plenty during active season. Skipping varroa mite treatments is the most common reason new beekeepers lose colonies heading into winter. And buying cheap, unventilated protective gear is a false economy — one bad sting through flimsy fabric and you'll spend twice as much replacing it.
Start with two hives if your budget allows. It sounds counterintuitive, but having two colonies lets you compare them, share resources between them, and learn twice as fast. It's one of the best pieces of advice working beekeepers give beginners.
A Worthwhile Investment in Your Land
Beekeeping rewards patience and observation more than money or fancy equipment. The homesteaders who stick with it long-term aren't necessarily the ones who spent the most upfront — they're the ones who took time to understand what their bees needed and responded accordingly. Start small, stay curious, and let the hive teach you. The honey is just the beginning.