Turn Your Trash Into Treasure: A Homesteader's Complete Guide to Composting All Year Long
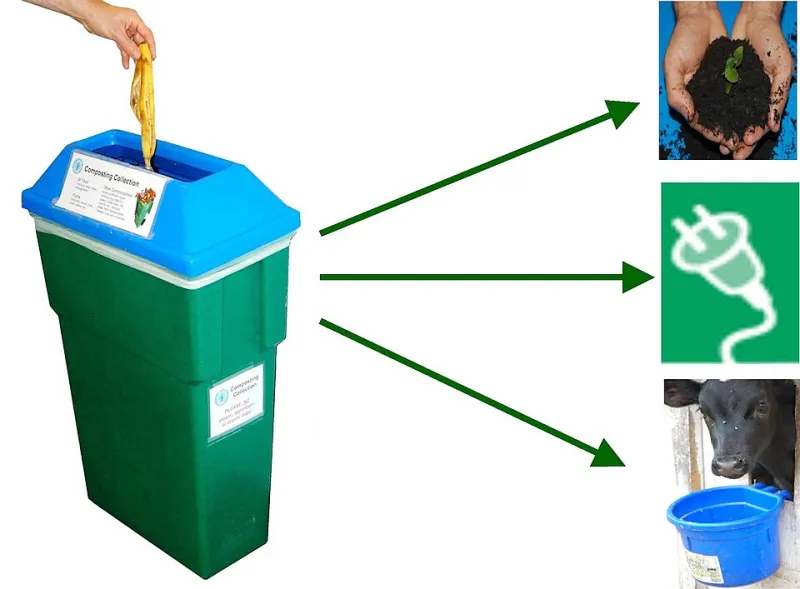
Photo: USEPA Environmental-Protection-Agency, Public domain, via Wikimedia Commons
If you're spending money on bagged fertilizer from the garden center every spring, there's a good chance you're leaving serious value on the table — or rather, in the trash can. Composting is one of those foundational homestead skills that pays you back season after season, and the startup cost is almost nothing compared to the long-term return. Whether you're working a quarter-acre backyard plot or managing a multi-acre rural property, a well-designed composting system is as essential to your land as a good fence line or a reliable water source.
Let's break down how to build a system that actually works for your situation — not some idealized setup from a magazine spread.
Why Composting Belongs in Your Homestead Infrastructure Plan
Most people think of composting as something you do for the environment. And sure, keeping organic material out of landfills is a solid bonus. But for homesteaders, the real motivation is practical: finished compost is a soil amendment that builds long-term fertility, improves drainage in clay-heavy soils, helps sandy soils retain moisture, and feeds the microbial life that makes your garden actually thrive.
Commercial fertilizers give plants a quick hit of nutrients, but they don't build soil structure. Compost does both. Over time, a garden that's been amended with compost year after year becomes noticeably easier to work, more drought-resilient, and more productive — without you having to keep buying inputs.
That's the homestead mindset: build systems that produce, not just consume.
Choosing Your Method: Hot, Cold, or Worm-Powered
Not all composting is created equal, and the right method depends on how much material you're generating, how fast you need finished compost, and how much time you want to spend managing the pile.
Hot Composting
Hot composting is the fast track. Done right, you can have finished compost in as little as four to six weeks. The process involves building a pile large enough to generate internal heat — typically at least three feet by three feet — with a balanced mix of nitrogen-rich "greens" (food scraps, fresh grass clippings, chicken manure) and carbon-rich "browns" (dried leaves, straw, cardboard, wood chips).
The general rule of thumb is a 3:1 ratio of browns to greens by volume. You'll want to keep the pile moist — think of a wrung-out sponge — and turn it every few days to introduce oxygen and maintain those high internal temperatures (ideally between 130°F and 160°F). At those temps, weed seeds and pathogens are killed off, which means you can safely compost a wider range of materials.
Hot composting takes more attention, but if you've got a large garden or a market garden operation, the speed and volume make it worth the effort.
Cold Composting
Cold composting is the low-maintenance option. You simply pile up your organic material — kitchen scraps, yard waste, spent garden plants — and let nature do its thing. No turning required, no temperature monitoring. The tradeoff is time: cold piles can take six months to two years to fully break down.
For smaller homesteads or folks who are just getting started, cold composting is a perfectly reasonable entry point. Set up two or three bins side by side, fill one while the other is breaking down, and you'll have a steady rotation going without much fuss.
Vermicomposting
Vermicomposting — composting with worms — is the method that surprises people the most. Red wigglers (not your average garden earthworm) process organic material incredibly fast and produce castings that are arguably the most nutrient-dense soil amendment you can put on a garden bed.
A worm bin takes up very little space, which makes it ideal for homesteaders who are working with limited square footage or who want to process kitchen scraps during the winter months when outdoor piles slow down. You can keep a bin in a garage, basement, or mudroom as long as temperatures stay between 55°F and 77°F. Feed your worms fruit and vegetable scraps, coffee grounds, and shredded paper, and they'll reward you with black gold in about two to three months.
Sizing Your System for Your Homestead
A solo homesteader or small family might get by with a single three-bin setup or a pair of tumbler composters. Larger properties with livestock — chickens, goats, rabbits — generate a significant volume of manure that can supercharge a compost operation. Chicken manure in particular is nitrogen-rich and will heat up a pile fast, but it needs to be composted before going on garden beds to avoid burning plants or introducing pathogens.
If you've got acreage, consider a dedicated composting area with multiple large windrow-style piles. This is especially useful if you're sheet mulching garden beds, building new growing areas, or amending a large vegetable plot each spring.
Keeping It Going Through Winter
Cold weather slows decomposition, but it doesn't have to stop your composting operation entirely. A few practical strategies:
- Insulate your pile. Cover it with a thick layer of straw bales or a tarp to retain heat and prevent it from freezing solid.
- Build bigger. Larger piles retain heat longer. Going into fall, try to build up your pile's mass.
- Stockpile browns. Keep a bin of dried leaves or wood chips nearby so you can keep adding layered material even when the ground is frozen.
- Rely on your worm bin. Keep your vermicomposting operation active indoors through the winter months so you're still processing kitchen scraps without waiting for the outdoor pile to thaw.
When spring rolls around and soil temps start climbing, your pile will wake back up. Turn it, add moisture if it dried out, and you'll be back in business quickly.
Maximizing Output During Growing Season
Spring and summer are your composting prime time. Grass clippings, garden trimmings, and a steady flow of kitchen scraps give you plenty of material to work with. A few tips to maximize production:
- Chop or shred materials before adding them to the pile. Smaller pieces break down faster.
- Water during dry spells. A dry pile is a slow pile.
- Add finished compost to beds as a top dressing or mix it into transplant holes at planting time.
- Side-dress established plants mid-season with a thin layer of compost to give them a boost without the risk of burning.
Composting isn't glamorous work. But it's one of those homestead habits that compounds over time — the more consistently you do it, the richer your soil gets, and the less you have to rely on anything outside your property lines. That kind of self-sufficiency is exactly what homesteading is all about.