Logs, Straw, and Coffee Grounds: How to Grow Mushrooms on Your Homestead All Year Long
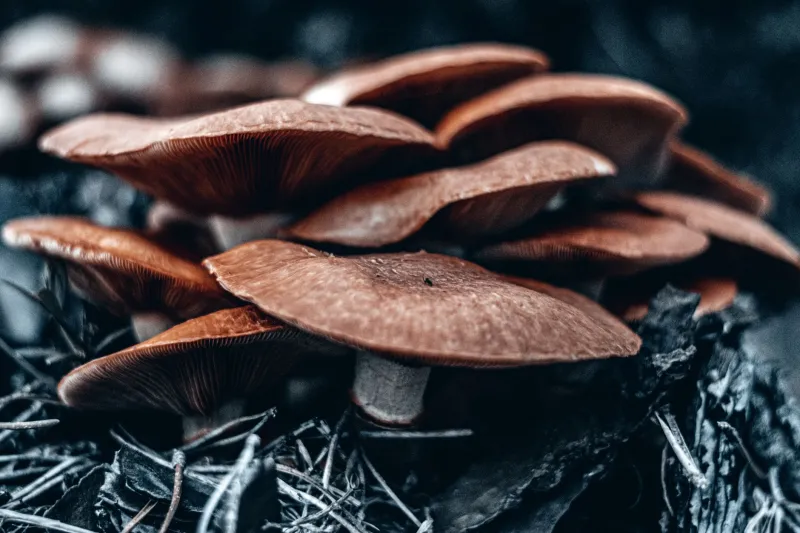
Most homesteaders are always hunting for that next low-input, high-reward project. Something that doesn't compete with the vegetable garden, doesn't demand daily attention, and actually produces something worth eating — or selling. Mushroom cultivation checks every one of those boxes, and yet it's one of the last things most folks think to add to their operation.
That's a missed opportunity. With a little setup and the right variety selection, you can be pulling fresh mushrooms off logs, straw bales, and even spent coffee grounds from late winter straight through early fall. Some setups produce year-round if you've got a shed or garage to work with. Let's break down how to make it happen.
Why Mushrooms Belong on Every Homestead
The first thing people ask is where mushrooms fit into a homestead that's already juggling chickens, a garden, fruit trees, and a dozen other projects. The honest answer is: they fit in the spaces everything else ignores.
Shaded corners under trees? Perfect for log inoculation. A spare corner of the barn or an old shed? Ideal for straw substrate grows. The spent coffee grounds your household generates every morning? That's free mushroom food going straight into your compost bin when it could be growing oyster mushrooms first.
Beyond the space efficiency, mushrooms fill a genuine nutritional and economic gap. Varieties like shiitake, lion's mane, and oyster mushrooms command real money at farmers markets and local restaurants. Medicinal types like reishi and turkey tail have carved out a devoted following among health-conscious buyers. And on the table, a homestead-grown mushroom beats anything from a grocery store shelf by a country mile.
Starting with Logs: The Long Game Worth Playing
Log inoculation is the most traditional method, and for good reason — it's cheap, durable, and produces harvests for years with almost no ongoing effort.
The basic process involves drilling holes into fresh-cut hardwood logs, inserting mushroom spawn (usually in the form of wooden dowels or sawdust plugs), sealing the holes with cheese wax, and letting the mycelium colonize the wood over several months. Once colonized, the logs fruit naturally in response to moisture and temperature changes.
Shiitake is the classic choice for log cultivation, and it thrives on oak, which is one of the most common hardwoods across most of the US. You'll want logs that are 3 to 8 inches in diameter and freshly cut — ideally within a few weeks of inoculation, before competing fungi get a foothold. A single log can produce mushrooms for three to five years before it's spent, and even then it breaks down into excellent garden compost.
For best results, lean your logs in a shaded, humid spot — the north side of a building, under a canopy of trees, or along a fence line works well. They need occasional watering during dry spells but otherwise take care of themselves. First fruiting typically happens 6 to 18 months after inoculation, so patience is part of the deal. Stack enough logs and stagger your inoculation dates, though, and you'll have a continuous rotation producing year after year.
Straw Substrate: Fast Results, Low Cost
If you want mushrooms in weeks rather than months, straw substrate grows are your answer. Oyster mushrooms — pearl, pink, blue, and golden varieties — are perfectly suited to this method and are among the most productive mushrooms you can grow.
The process is straightforward. You pasteurize straw (wheat or oat straw both work well) by soaking it in hot water or treating it with hydrated lime, then pack it into buckets, bags, or low-cost plastic containers layered with oyster mushroom spawn. The mycelium colonizes the straw within a week or two, and fruiting bodies begin to emerge shortly after.
A 5-gallon bucket drilled with holes around the sides makes an excellent low-cost fruiting chamber. Keep it in a spot with indirect light, mist the exterior a couple of times a day, and you'll be harvesting clusters of oyster mushrooms within three to four weeks of inoculation. Each bucket can produce two to three flushes before the substrate is exhausted — and at that point, it makes a fantastic amendment for the garden.
The economics here are hard to argue with. A bag of straw costs almost nothing, spawn is inexpensive and available from numerous US suppliers, and oyster mushrooms sell for $10 to $20 per pound at farmers markets in most regions. Run a dozen buckets in rotation and you've got a genuine side income that fits in a corner of your garage.
Coffee Grounds: Turning Waste into Harvest
Spent coffee grounds are an often-overlooked substrate that works particularly well for oyster mushrooms. They're already partially sterilized by the brewing process, nitrogen-rich, and — if you've got a local coffee shop willing to save their grounds — essentially free in large quantities.
The method mirrors the straw approach. Mix fresh (not old or moldy) spent grounds with oyster spawn, pack into containers, and keep them in a humid, shaded location. Because coffee grounds are denser than straw, airflow and moisture management matter a bit more, but the results can be impressive. This is a great entry-level project for homesteaders who want to test the waters before committing to a full log or straw operation.
Choosing Your Varieties by Season
One of the smartest moves a homestead mushroom grower can make is selecting varieties that complement each other across the calendar. Here's a practical starting lineup:
- Shiitake — Spring and fall fruiting on logs; the workhorse of the homestead mushroom patch.
- Oyster mushrooms — Year-round on straw or coffee grounds if you're growing indoors; outdoor logs fruit in spring and fall.
- Wine caps (Stropharia rugosoannulata) — A garden bed mushroom that grows directly in wood chips; excellent for filling shaded garden paths.
- Lion's mane — A premium variety with strong market demand; does well on supplemented sawdust blocks.
- Reishi — Slow-growing but medicinal and highly valuable; excellent for logs or sawdust blocks in a shaded location.
With even a modest mix of these varieties, you can expect fresh mushrooms on your table — and potentially at market — from early spring through late fall, with indoor setups extending that window considerably.
Equipment You Actually Need
One of the best things about mushroom cultivation is how lean the startup costs are. For a basic log operation, you need a drill with an inoculation bit, wooden dowel or sawdust plug spawn, cheese wax, and a wax applicator. Total cost: often under $50, not counting the logs themselves.
For straw grows, you need a large pot or cooler for pasteurization, grow bags or buckets, spawn, and a spray bottle for misting. Again, startup costs are minimal.
The one investment worth making as you scale up is a reliable spawn supplier. Several excellent US-based companies ship fresh spawn, and the quality difference between fresh spawn and old, poorly stored product is significant. Do your research, read reviews, and don't cut corners there.
Fitting Mushrooms Into the Bigger Picture
What makes mushroom cultivation such a natural fit for a homestead is how neatly it integrates with everything else you're already doing. Spent straw substrate feeds the compost pile or goes directly into garden beds. Exhausted logs break down into rich woody compost. Mushrooms fill the nutritional role of protein and minerals in a diet that's already heavy on vegetables. And the shaded, moist corners of the property that are useless for everything else become productive growing space.
If you're looking for a low-cost, low-labor addition that produces real food, real medicine, and real income from resources most homesteads already have lying around — mushrooms deserve a serious look. Start with a half-dozen logs and a couple of straw buckets, see what grows, and go from there. Chances are, within a season or two, you'll be wondering why you waited so long.