Plant It Once, Eat Forever: How to Build a Heirloom Seed Library That Keeps Your Homestead Fed for Generations
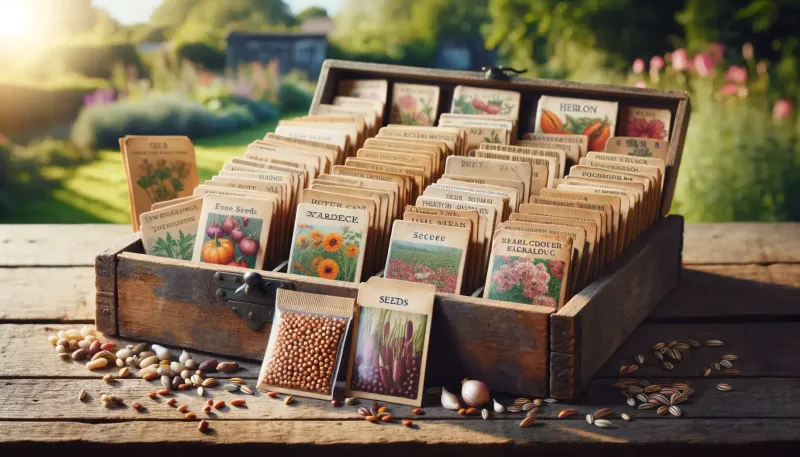
Photo: heirloom seeds organized in paper envelopes seed saving collection rustic wooden table, via humphreymalone.com
There's something quietly revolutionary about slipping a dried bean into a paper envelope and writing a name on it in pencil. That little seed holds genetics that might be a hundred years old—maybe more. It survived wars, droughts, and the rise of industrial agriculture. And if you treat it right, it'll feed your grandkids.
Building a heirloom seed library isn't complicated, but it does take intention. Once you get the system down, it becomes one of those homestead habits that pays you back every single season—financially, practically, and in ways that are harder to put a dollar amount on.
Why Heirloom Seeds Are Worth the Effort
Let's start with the obvious question: why bother saving seeds when you can just order a new packet every spring?
First, cost. A packet of quality seeds runs anywhere from $3 to $6 or more these days. Multiply that across a full garden—tomatoes, peppers, squash, beans, greens, herbs—and you're looking at a serious annual expense. Heirloom seeds you save yourself cost you nothing after the first purchase.
Second, reliability. Modern hybrid varieties (labeled F1 on seed packets) are bred to produce one exceptional crop, but their offspring are unpredictable. You can't save them and expect the same results next year. Heirloom varieties, on the other hand, are open-pollinated. Save the seeds, plant them again, and you'll get the same plant—season after season, decade after decade.
Third, and this one matters a lot if you're serious about homesteading: adaptation. When you grow the same heirloom variety in your specific soil, your specific climate, for several years running, those seeds start to adapt to your conditions. They become your seeds in a real sense. That's a kind of agricultural wealth that no seed catalog can sell you.
Starting Smart: Sourcing Quality Heirloom Seeds
Before you can save seeds, you need good ones to start with. Look for reputable seed companies that specialize in open-pollinated and heirloom varieties. Organizations like the Seed Savers Exchange (based in Iowa) have been preserving rare and regional varieties for decades and are a fantastic starting point. Many small regional seed companies also carry varieties bred specifically for different climate zones across the US.
When you're just getting started, focus on the easiest seeds to save:
- Tomatoes – Self-pollinating and relatively simple to process
- Beans and peas – Just let the pods dry on the vine
- Lettuce – Bolt a few plants and collect the fluff
- Peppers – Dry the seeds from fully ripe fruit
- Squash – Scoop, rinse, and dry
Save the corn and brassicas (broccoli, cabbage, kale) for when you've got more experience—cross-pollination makes those trickier to manage.
The Seed-Saving Process, Step by Step
Different plants require slightly different techniques, but the general process is pretty consistent.
Wet processing is used for seeds that come inside a fleshy fruit—tomatoes being the classic example. Scoop the seeds and gel into a jar with a little water and let it ferment at room temperature for two to three days. The viable seeds will sink, the bad ones and gel will float. Rinse, strain, and spread the keepers on a paper plate or coffee filter to dry completely.
Dry processing covers most everything else—beans, peppers, squash, flowers. Let the seeds reach full maturity on the plant before harvesting. If frost threatens before they're ready, pull the whole plant and hang it upside down in a dry space to finish maturing. Once the pods or fruit are dry and papery, shell or scrape the seeds out and spread them in a single layer to air dry for at least two weeks before storing.
The key word in both methods is completely dry. Moisture is the enemy of stored seeds. Even a little residual dampness can lead to mold and ruin an entire batch.
Organizing Your Seed Library Like a Pro
Here's where a lot of homesteaders drop the ball. They save seeds, toss them in a shoebox, and then spend twenty minutes digging through unlabeled envelopes every spring. Don't be that person.
A functional seed library doesn't have to be fancy—it just has to be consistent. Here's a simple system that works:
- Use small paper envelopes or coin envelopes for individual seed varieties. Write the variety name, plant type, year saved, and any notes (flavor, yield, disease resistance) directly on the envelope.
- Organize by category in a recipe box or small filing system. Divide by plant family: Nightshades, Legumes, Cucurbits, Greens, Herbs, Flowers.
- Add a master list — a simple spreadsheet or even a handwritten notebook that tracks what you have, how old it is, and germination rates from your last test.
- Test older seeds before planting season. Lay ten seeds on a damp paper towel, roll it up, and check after a week. If fewer than six sprout, your germination rate is dropping and you should either plant more densely or refresh that variety.
Storage conditions matter as much as organization. Seeds stay viable longest when kept cool, dark, and dry. A sealed mason jar with a small silica gel packet stored in a cool basement or refrigerator can keep most seeds viable for three to five years—sometimes longer.
The Genetic and Financial Case for Seed Saving
Let's put some real numbers on this. A homesteader growing a serious market garden might spend $150–$200 per year on seeds. Build a solid heirloom seed library over two or three seasons, and that expense drops to nearly zero—maybe a small amount for varieties you want to add or refresh. Over ten years, that's potentially $1,500 or more back in your pocket.
Beyond the money, there's something bigger at stake. Industrial seed production has narrowed the genetic diversity of our food supply dramatically. The USDA estimates that the US has lost roughly 90% of the fruit and vegetable varieties that existed a century ago. Every homesteader who saves and grows heirloom seeds is doing something genuinely important—preserving genetic material that might otherwise disappear forever.
That's not hyperbole. It's history. And it's one of the most meaningful things you can do on a small piece of land.
Making It a Homestead Tradition
The best seed libraries aren't just storage systems—they're living records of a family's land and growing history. Write notes in the margins. Save seeds from your best-performing plants, not just any plant. Trade extras with neighbors or local seed swaps. Pass envelopes down to your kids with the story of where the seeds came from.
At Homestead Stores, we believe real food independence starts with what you put in the ground. And nothing puts you more in control of that than seeds you grew, saved, and understand intimately.
Start small. Pick three or four varieties this season. Save them properly, store them well, and plant them again next year. By the time you've done that for a few seasons, you'll have the foundation of something that can genuinely feed your family—not just this year, but for generations to come.