One Space, Every Job: How to Design a Hardworking Homestead Workshop
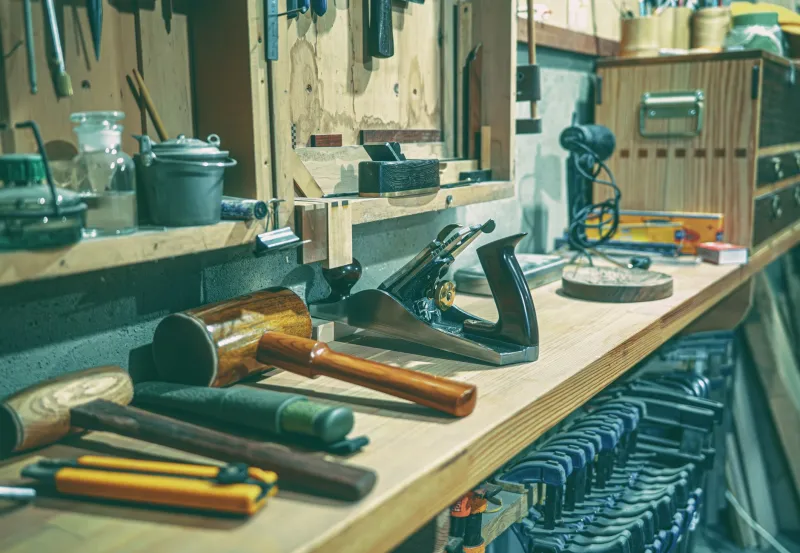
Every homesteader eventually hits the same wall. You need to sharpen a chisel, but the grinder is buried behind a grain bin. You want to can a batch of tomatoes, but the only flat surface is covered in motor oil and baling wire. Your soap molds are in a box somewhere near the chainsaw. Sound familiar?
The fix isn't a bigger property — it's a smarter workspace. A well-organized, multi-purpose homestead workshop can handle tool maintenance, small equipment repair, food processing, and craft projects all under one roof. You don't need a massive building or a contractor's budget. You need a plan.
Start With Zones, Not Square Footage
The biggest mistake folks make when setting up a workshop is treating the whole space like one big room. Everything lands on the same bench, tools migrate everywhere, and within a month the place is unusable.
Instead, think in zones — defined areas where specific types of work happen. Even in a 12x20 shed or a half-converted barn bay, you can carve out at least three distinct spaces:
The Mechanical Zone is where you deal with anything metal, greasy, or loud. This is your bench vise territory. Grinders, drill presses, wrenches, and spare parts live here. Concrete or sealed wood flooring works best since spills are inevitable. Good overhead lighting and a pegboard wall for tool organization will save you more time than any single tool you own.
The Processing Zone is food-safe and kept clean. This is where you run a grain mill, operate a dehydrator, press juice, or run a small canning setup. Think about easy-clean surfaces — stainless steel or sealed butcher block counters, a utility sink with hot water if you can manage it, and enough electrical outlets to run appliances without running extension cords across the floor.
The Craft and Assembly Zone handles the lighter work — seed sorting, soap making, leather repair, fabric projects, small woodworking. A large flat table, adjustable lighting, and good storage for small supplies are your priorities here.
You don't need a wall between zones. A change in flooring, a shift in bench height, or even just a consistent storage system signals the transition. The point is that everything in a zone belongs there, and nothing else does.
Layout Strategies That Actually Work
Flow matters more than most people realize. Think about how you move through the space during a typical work session. You shouldn't have to cross through the mechanical zone to get to the processing sink. Heavy equipment should be close to the door so you're not hauling engines through your whole building.
Put your most-used tools at arm's reach. The stuff you grab every single day — hand tools, measuring tape, safety glasses — should never require a search. Wall-mounted tool boards and magnetic strips are cheap and incredibly effective. Reserve cabinet space for things you use weekly or seasonally.
For tight spaces, vertical storage is your best friend. Shelving units that run floor to ceiling can hold an enormous amount of gear without eating into your floor plan. Label everything. Seriously. It sounds obvious until you're looking for a specific bit at dusk in a hurry.
Essential Equipment Without the Sticker Shock
You don't need to outfit your workshop all at once, and you definitely don't need to buy everything new. Here's a tiered approach that lets you build out over time.
Start with the foundation:
- A solid workbench (build one from 2x4s and plywood — it'll outlast anything flat-packed)
- A bench vise, at least 4-inch jaw width
- Basic hand tools: hammers, chisels, screwdrivers, files, a good set of wrenches
- A corded drill and a set of quality bits
- An angle grinder — one of the most versatile tools on any homestead
Add these as budget allows:
- A drill press for accurate, repeatable holes
- A bench grinder for sharpening and shaping metal
- A band saw or scroll saw if woodworking is in your plans
- A small welder — a flux-core MIG unit runs under $300 and handles most farm repairs
- A grain mill if you're growing and processing your own feed or flour
Budget-friendly alternatives worth knowing: Auctions — both local farm auctions and online platforms like GovPlanet or Facebook Marketplace — are loaded with quality used equipment. Old cast-iron tools were built to last generations. A used drill press from a retiring machinist will outperform a cheap new one every time. Estate sales in rural areas are goldmines. Get on your county's auction notification list and be patient.
Power, Lighting, and Ventilation — Don't Skip These
A lot of homesteaders put serious thought into equipment and almost none into infrastructure. That's backwards. A workshop with poor lighting, inadequate power, and bad ventilation will frustrate you constantly regardless of what tools you own.
For power, run at least one 20-amp circuit dedicated to the workshop if you're working from an existing structure. If you're building new, talk to an electrician about adding a 240-volt outlet for larger equipment down the road. A few well-placed outlets on each wall beat a tangle of power strips every time.
Lighting should be bright and shadow-free. LED shop lights are inexpensive and use very little electricity. Put them on a circuit separate from your power tools so a tripped breaker doesn't leave you in the dark. Add a task light over your main bench for close work.
Ventilation matters most in the processing and mechanical zones. Fumes from solvents, dust from grinding, steam from canning — none of that should build up in your workspace. A window exhaust fan and cross-ventilation from an opposite opening is a minimal but functional setup. If you're welding, a dedicated fume extractor is worth every penny.
Making the Most of a Converted Space
Not everyone is starting from a blank slate. Many homesteaders are working with what they've got — a corner of an old dairy barn, a detached garage, a large basement. These spaces come with quirks, but they're workable.
In a basement, moisture is your main enemy. Seal the floor, run a dehumidifier, and keep metal tools oiled or stored in sealed cases. Basements work well for craft zones and processing areas but are less ideal for mechanical work if ventilation is limited.
Barn conversions often mean uneven floors, drafty walls, and rodent pressure. A poured concrete pad in your main work area solves the floor problem. Insulating at least one section of wall keeps your processing zone usable in winter. And good pest management — sealed storage bins, regular cleaning, a barn cat or two — protects both your food supplies and your equipment.
The Workshop That Grows With You
Your homestead will evolve, and your workshop should too. Build with flexibility in mind. Use freestanding shelving instead of fixed cabinets where you can. Keep pathways clear so you can rearrange as your needs change. Leave wall space open for tools and equipment you haven't acquired yet.
The goal isn't a perfect workshop on day one. It's a functional, organized space that makes every job on your property a little easier — whether you're rebuilding a carburetor, grinding grain, or turning out a batch of beeswax candles. One smart space really can do it all.